- This tutorial is tested on FreeBSD 11.x.
- netdata is an optional component since iRedMail-0.9.8.
What’s netdata
netdata (http://my-netdata.io) is a “Simple. Effective. Awesome!” monitor which can monitor almost everyting on your Linux/FreeBSD system. You can visit its website to check online demo.
We will show you how to install and configure netdata on iRedMail server (Linux) to monitor mail service related softwares.
Install netdata
cd /usr/ports/net-mgmt/netdata
make install clean
Configure netdata
Main config file of netdata is /usr/local/etc/netdata/netdata.conf, it contains many parameters with detailed comments. Here’s the config file used by iRedMail:
- It binds to address
127.0.0.1and port19999by default. Since it doesn’t have ACL control, we will run netdata behind Nginx to get ACL control done in Nginx.
[registry]
    enabled = no
[global]
bind to = 127.0.0.1 run as user = netdata default port = 19999 update every = 3
[plugin:proc]
# Disable IPVS check since iRedMail doesn’t use ipvs by default /proc/net/ip_vs/stats = no # inbound packets dropped /proc/net/dev = no
netdata ships a lot modular config files to gather information of softwares running on the server, they have very good default settings and most config files don’t need your attention at all, including:
- System resources (CPU, RAM, disk I/O, etc)
- Nginx log file monitoring
- Fail2ban jails
- Memcached
- …
But some applications do require extra settings, we will cover them below.
Monitor OpenLDAP
OpenLDAP supports an optional monitoring interface you can use to obtain information regarding the current state of your OpenLDAP server. For instance, the interface allows you to determine how many clients are connected to the server currently. The monitoring information is provided by a specialized backend, the monitor backend. A manual page, slapd-monitor(5) is available.
netdata-1.11.1 (released on 23 Nov 2018) supports monitoring OpenLDAP through its monitor backend.
To enable monitor backend in OpenLDAP, please append lines below in /usr/local/etc/openldap/slapd.conf:
You must replace dc=example,dc=com by the real LDAP suffix that you use.
database monitor
access to dn="cn=monitor"
    by dn.exact="cn=Manager,dc=example,dc=com" read
    by dn.exact="cn=vmail,dc=example,dc=com" read
    by * none
It enables OpenLDAP backend monitor, also grant read access to dn cn=Manager,dc=example,dc=com and cn=vmail,dc=example,dc=com. Again, you must replace dc=example,dc=com by the real LDAP suffix that you use.
Also find lines in slapd.conf like below:
modulepath /usr/local/libexec/openldap
moduleload back_mdb
Append a new moduleload directive right after moduleload back_mdb like below:
moduleload back_monitor
Now restart OpenLDAP service.
Create file /usr/local/etc/netdata/python.d/openldap.conf with content below:
- You must replace
dc=example,dc=comby the real LDAP suffix that you use. - You must replace
<password-of-vmail>by the real password ofcn=vmail. You can find it in files under/usr/local/etc/postfix/ldap/.
update_every: 5

local:
    username : "cn=vmail,dc=example,dc=com"
    password : "<password-of-vmail>"
    server   : "localhost"
    port     : 389
    timeout  : 1
Now restart netdata service.
Monitor Nginx and php-fpm
We need to enable stub_status in Nginx to get detailed server info, also update php-fpm config file to enable similar feature.
- Create Nginx config snippet
/usr/local/etc/nginx/templates/stub_status.tmplwith content below:
location = /stub_status {
    stub_status on;
    access_log off;
    allow 127.0.0.1;
    deny all;
}

location = /status {
    include fastcgi_params;
    fastcgi_pass php_workers;
    fastcgi_param SCRIPT_FILENAME $fastcgi_script_name;
    access_log off;
    allow 127.0.0.1;
    deny all;
}
- Update default virtual host config file
/usr/local/etc/nginx/sites-enabled/00-default.conf, include new snippet config filestub_status.tmplafter theredirect_to_https.tmplline like below:
server {
    ...
    include /usr/local/etc/nginx/templates/redirect_to_https.tmpl;
    include /usr/local/etc/nginx/templates/stub_status.tmpl;      # <- add this line
    ...
}
- Update php-fpm pool config file
/usr/local/etc/php-fpm.d/www.conf, enable parameterpm.status_pathlike below:
pm.status_path = /status
- Restart both php-fpm and Nginx service.
Monitor Dovecot
We need to enable statistics module in Dovecot.
- Please open Dovecot config file
/usr/local/etc/dovecot/dovecot.conf, append pluginstatsin global parametermail_plugins, andimap_statsfor imap protocol:
mail_plugins = ... stats

protocol imap {
    mail_plugins = ... imap_stats
    ...
}
- Append settings below in Dovecot config file:
plugin {
    # how often to session statistics (must be set)
    stats_refresh = 30 secs
    # track per-IMAP command statistics (optional)
    stats_track_cmds = yes
}

service stats {
    fifo_listener stats-mail {
        user = vmail
        mode = 0644
    }

    inet_listener {
        address = 127.0.0.1
        port = 24242
    }
}
- Restart Dovecot service.
Monitor MySQL/MariaDB server
netdata requires a SQL user (we use netdata here) with privilege USAGE to gather MySQL server information.
- Create the SQL user with a strong password (please replace
<password>in command below by the real (and strong) password).
# mysql -u root
sql> GRANT USAGE ON *.* TO netdata@localhost IDENTIFIED BY '<password>';
sql> FLUSH PRIVILEGES;
- Create file
/usr/local/etc/netdata/python.d/mysql.confwith content below.- This file already exists, feel free to remove all content in this file and copy content below as its new content.
- Please replace
<password>below by the real password.
tcp:
    name: 'local'
    host: '127.0.0.1'
    port: '3306'
    user: 'netdata'
    pass: '<password>'
Monitor PostgreSQL server
netdata requires a SQL user (we use netdata here) to gather PostgreSQL server information.
- Create the SQL user with a strong password (please replace
<password>in command below by the real (and strong) password).
# su - postgres
$ psql
sql> CREATE USER netdata WITH ENCRYPTED PASSWORD '<password>' NOSUPERUSER NOCREATEDB NOCREATEROLE;
- Create file
/usr/local/etc/netdata/python.d/postgres.confwith content below.- This file already exists, feel free to remove all content in this file and copy content below as its new content.
- Please replace
<password>below by the real password.
socket:
    name     : 'local'
    user     : 'netdata'
    password : '<password>'
    database : 'postgres'
Configure Nginx to forward requests to netdata
- Create Nginx config snippet
/usr/local/etc/nginx/templates/netdata.tmplwith content below:
# Running netdata as a subfolder to an existing virtual host
# FYI: https://github.com/firehol/netdata/wiki/Running-behind-nginx

location = /netdata {
    return 301 /netdata/;
}

location ~ /netdata/(?<ndpath>.*) {
    proxy_redirect off;
    proxy_set_header Host $host;

    proxy_set_header X-Forwarded-Host $host;
    proxy_set_header X-Forwarded-Server $host;
    proxy_set_header X-Forwarded-For $proxy_add_x_forwarded_for;
    proxy_http_version 1.1;
    proxy_pass_request_headers on;
    proxy_set_header Connection "keep-alive";
    proxy_store off;
    proxy_pass http://127.0.0.1:19999/$ndpath$is_args$args;

    gzip on;
    gzip_proxied any;
    gzip_types *;

    auth_basic "Authentication Required";
    auth_basic_user_file /usr/local/etc/nginx/netdata.users;
}
- Update default virtual host (https site) config file
/usr/local/etc/nginx/sites-enabled/00-default-ssl.conf, include new snippet config filenetdata.tmplbefore themisc.tmplline like below:
server {
    ...
    include /usr/local/etc/nginx/templates/netdata.tmpl;      # <- add this line
    include /usr/local/etc/nginx/templates/misc.tmpl;
    ...
}
- Create new file
/usr/local/etc/nginx/netdata.usersused for basic http auth:
touch /usr/local/etc/nginx/netdata.users
- Run command below to generate a SSHA password hash. NOTE: Please replace
<password>below by a real, strong password.
doveadm pw -s SSHA -p '<password>'
The password looks like this {SSHA}Tama1midwSV6XWTlonR6n6sNM8yuEPvv.
- Now open
/usr/local/etc/nginx/netdata.userswith your faviourite text editor, add a line like below to create an account used to access netdata. The format is<username>:<password>.
postmaster@domain.com:{SSHA}Tama1midwSV6XWTlonR6n6sNM8yuEPvv
- Restart nginx service.
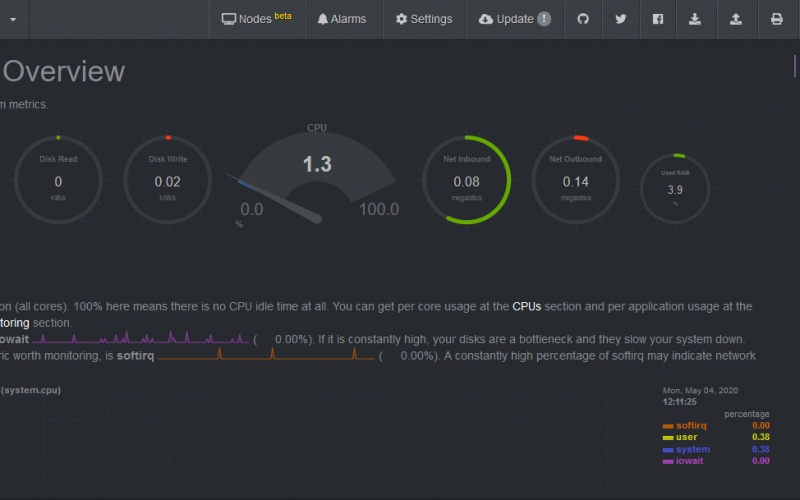
Now open a web browser and access url https://your-server/netdata/ (please replace your-server by the real domain name), it will ask you to input username and password for authentication, please use the account we just added in file /usr/local/etc/nginx/netdata.users to login.
This is what you see after successfully logged in: